- Knowledge Base
- Product Updates
- Major Releases
-
Getting Started
-
Training Videos
-
Product Updates
-
PMS Integration
-
Home Guides
-
Area Guides
-
Guestbook
-
Guests
-
Messages
-
SMS Webchat
-
Scheduler
-
Alerts
-
Guest Surveys
-
Extend Stays
-
Import Contacts
-
Reports
-
Tags
-
Team
-
My Profile
-
Miscellaneous
-
Troubleshooting
-
Sample Saved Responses
-
Work Orders
-
System Messages
-
Message Templates
-
Announcments
September 2020 Product Updates
Tags
Tags are labels you create to help organize your property and destination guides. Tagging helps you send scheduled messages or alerts to guests staying at a specific group of properties. Examples of tags include state, city, condo and community. Tags are easy to customize, so you can create and assign them as you see fit.
To add tags to your account:
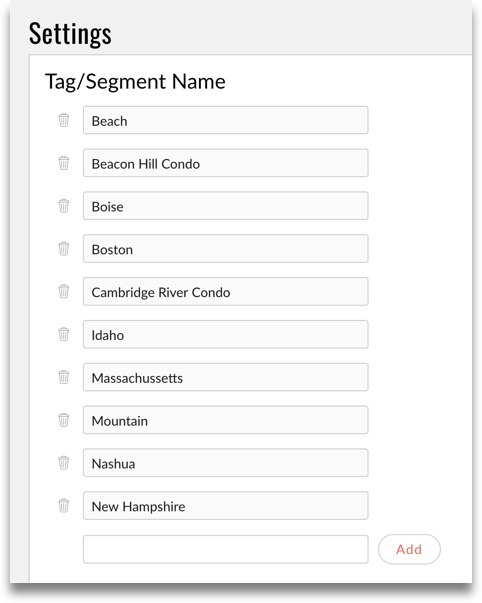
- Go to Settings > Tags
- Add the tags that you require. You can always come back and add more.

To add tags to Destination Guides:
- Go to the Destination Guides page
- Click the “+” icon under Tags/Segments. Select the tags that apply. You can add as many tags as you like. We have already added city and state tags for your convenience.

To add tags to Property Guides:
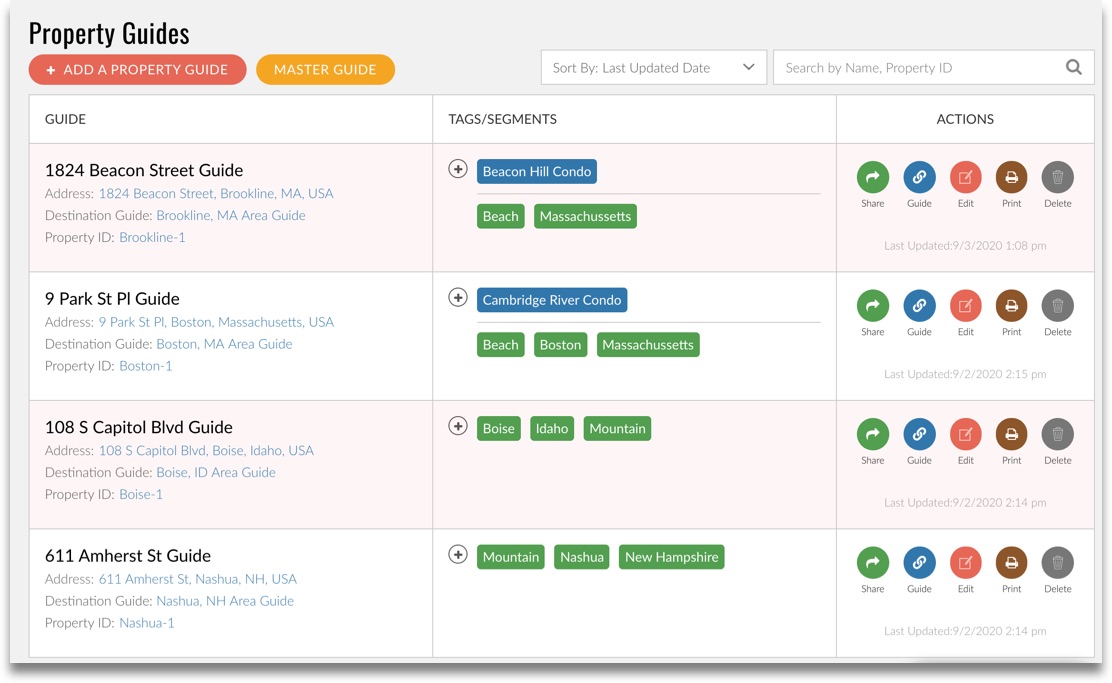
- Go to the Property Guides page
- Click the “+” icon under Tags/Segments. Select the tags that apply. Destination guides are automatically added based on the destination guide attached to the property guide. You can add as many tags as you like.

To add tags to a Scheduled Message:
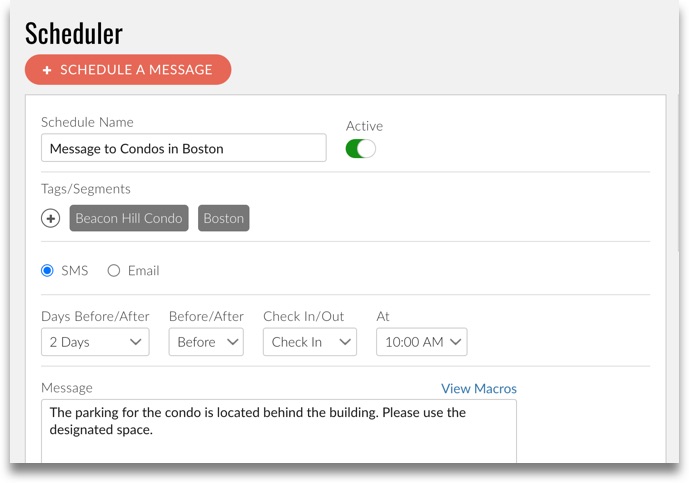
- Go to the Scheduler page
- Click the “+” icon under Tags/Segments. Select the tags for the recipients of the message. The right column will show you a list of properties to help you ascertain your selection.

To add tags to an Alert:
- Go to the Alerts page
- Click the “+” icon under Tags/Segments. Select the tags for the recipients of the alert. The right column will show a list of guests and properties who will receive the message.
